Repacking Your Own Paraglider Reserve:
How do you repack a paraglider reserve parachute:
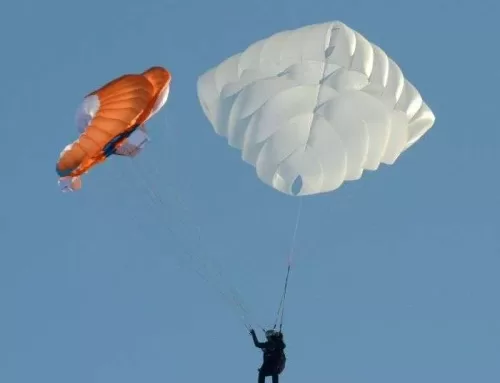
Paragliding is a sport that allows us to soar through the sky, but safety should always be our top priority. One crucial aspect of paragliding safety is ensuring that our reserve parachute is properly packed and ready for deployment in case of an emergency. While it’s recommended to have a professional repack your reserve, knowing how to repack it yourself can provide an extra level of self-sufficiency and peace of mind.
In this article, we will guide you through the process of repacking your own paraglider reserve.
1. Understand the Importance of Reserve Repacking:
The reserve parachute is your last line of defense in case of a catastrophic failure of your main wing. It is crucial to have it packed correctly to ensure its proper deployment and functionality. Regularly repacking your reserve can improve opening time (Over time the fabric gets compressed which delays opening). Dirt and sand find its way into the reserve parachute (causing damage through abrasion). Moisture from a leaky ballast or wet grass can get into the reserve (causing mildew and delaying its opening time). The rubber bands can begin to harden, melt and disintegrate.
Some manufactures of reserves recommend a repack every six months, if exposed to moisture the reserve needs to be opened as soon as possible and air dried out of direct sun.
2. Gather the Necessary Tools and Equipment:
Before you begin the repacking process, gather the following tools and equipment: – A clean and spacious area to work in – Your reserve parachute and its container – A reserve repacking manual or instructions from the manufacturer – A small brush or cloth for cleaning – a short cord to pass through the packing tabs, a heavy weight or tie off point to stretch the lines during folding, weights (books will work as weights) to place on the reserve during folding, new rubber bands, and if desired a line folding peg board to have clean line folds and avoid loose lines which can tangle and prevent or delay proper deployment of the reserve.
3. Follow the Manufacturer’s Instructions:
Each reserve parachute and container may have specific repacking instructions provided by the manufacturer. It is crucial to carefully read and understand these instructions before proceeding. The manufacturer’s guidelines will outline the steps, techniques, and any specific requirements for your particular reserve system. Most square reserves pack similarly but the recommended final folding procedure varies among different reserve manufacturers. Modifying a fold to increase opening speed may cause an opening shock to the reserve and damage it.
4. Inspect and Clean the Reserve:
Before repacking, Test pull the reserve from the harness while seated in the harness hung from a simulator, be sure it extracts easily and completely. Next lift the reserve by the bridal to be sure the weight of the reserve releases the loops that hold the container closed. If this test fails, then you will need to replace the bungee loops and properly size them to allow the bights of line to slip out under the weight of the reserve
Open the reserve and hang it for 12 hours to air it and relax the fabric. Thoroughly inspect your reserve parachute for any signs of damage, wear, or deterioration. Check the lines, fabric, and stitching for any tears, fraying, or other issues. Clean the reserve by gently brushing off any dirt or debris. Inspect the bridal, and deployment bag for damage. Check manufacture date, if not specified in the reserve manual, industry standard is to replace any reserve ten years old.
5. Fold and Pack the Reserve:
Follow the step-by-step instructions provided by the manufacturer to fold and pack the reserve parachute into its container. Pay attention to the order and arrangement of the lines as they run from the reserve to the risers ensuring they are not tangled or twisted with any line overs. Take your time and ensure that each fold is neat and precise. To help make your final folds to the container size you can use a thin hardback book or a Teflon cutting tray (approx. 8 1/2″ X 11″) that you lay onto the reserve as you make each fold, then slide out and repeat for each fold. Be prepared to start over if the folds begin to “puff out” or become disorganized. Most first-time reserve repacks will need to be started from scratch a few times!
Next, you’ll be figure-eighting the lines to slightly less than the width of the container. The figure-eighting of the lines can be done free hand or with the use of a pegboard.
6. Secure with Rubber Bands:
Next, you’ll use the appropriate rubber bands to contain the lines of the reserve after you’ve completed figure-eighting them. After the rubber bands are placed on the lines you will place them in the container. Refer to the manufacturer’s instructions & read our article on sourcing and selecting rubber bands for guidance. Ensure the rubber bands are tight enough to lightly hold the reserve lines in place but, not overly tight, as this could cause delay or prevent deployment.
Pay special attention to the procedure for closing the container. Some packers use a two-stage method of closing the container where two separate bights or loops are used to hold the container closed. We recommend you follow the procedure as recommended by the manufacturer.
7. Test throw & Seek Professional Verification:
After repacking your reserve, you should install the reserve in your harness and then hang from a simulator and test pull your reserve. Check out how it opens, did it completely unfold, did the container fall away? Then pack it again!
We also recommended you have a professional inspect and verify your work. They can provide valuable feedback, ensure the reserve was correctly packed, and address any potential issues you might have missed.